Completing the FAFSA® Form: Steps for Parents

This article reflects updates to the 2026–27 FAFSA® process, including how to invite contributors to the FAFSA form.
Completing the Free Application for Federal Student Aid (FAFSA®) form is necessary for students to be eligible to receive federal student aid.
We strongly recommend that your child (the student) start their own FAFSA form and complete their sections first to save time and prevent errors. We know that isn’t always how it happens, though. Whether you’re starting the FAFSA form on behalf of your child or entering their form after being invited as a contributor, follow the steps below to avoid running into issues and to help your child obtain federal student aid.
Note: The steps below show the process for a parent starting the FAFSA form before the student. If the student starts the FAFSA form first, the process will be faster. In that case, you should follow steps 1 and 4–8.
- Create an account and gather documents.
- Start the FAFSA® form at StudentAid.gov.
- Complete the “Student Personal Circumstances” section.
- Provide consent and approval.
- Complete the “Parent Demographics” section.
- Complete the “Parent Financials” section.
- Invite your spouse as a contributor (if required).
- Sign the FAFSA® form.
- Have your child provide their information, consent and approval, and a signature.
Tips Before You Get Started
Before you begin, review key information about the FAFSA process.
FAFSA® Deadlines
Your child will need to complete a FAFSA form every year they’re enrolled in school to receive student aid. Schools will use your child’s FAFSA information to determine their eligibility for aid and their financial aid offer. States also use FAFSA information to award their own aid.
Each school and state have their own deadline for completing the FAFSA form. Many states have limited funds available, so completing the FAFSA form before your state’s deadline is the best way to ensure that your child is eligible for as much aid as possible for college, career school, or trade school.
Required Contributors
Dependent students must provide parent information on the FAFSA form, and in most cases, at least one parent will be identified as a contributor on the form. A contributor refers to anyone (the student, the student’s spouse, their biological or adoptive parent, or a parent’s spouse) who is required to provide information on the FAFSA form.
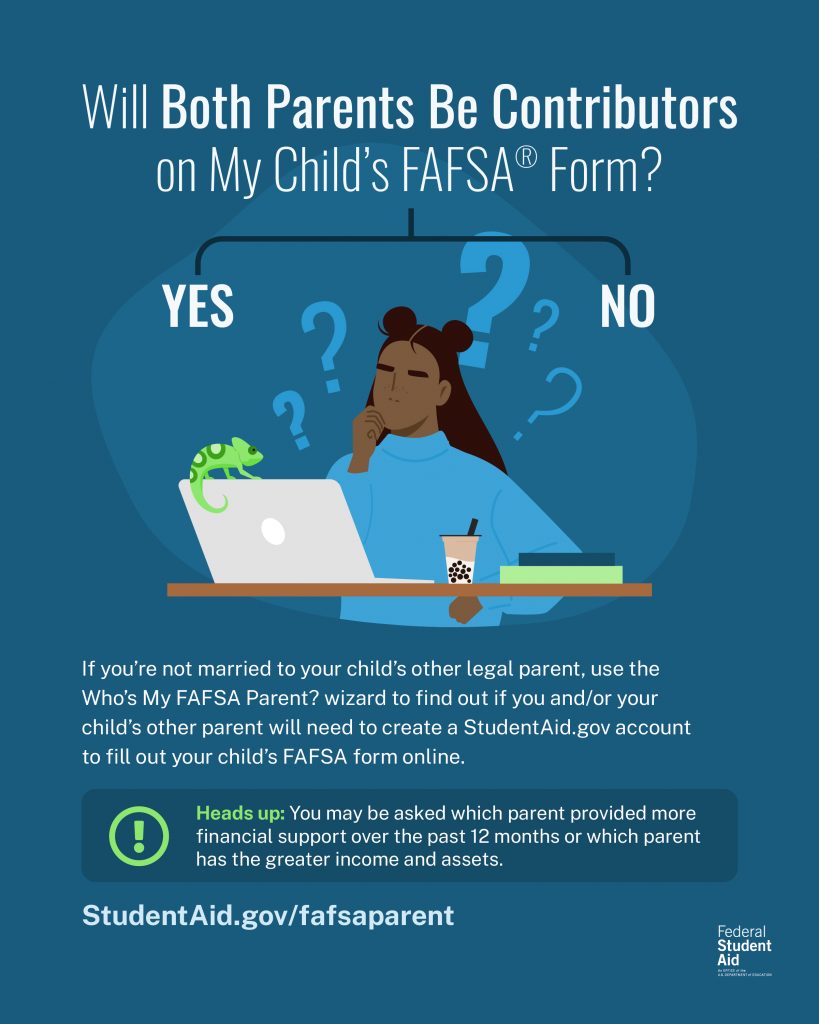
You can use the Who’s My FAFSA Parent? wizard to determine if you and/or another parent will need to participate on your child’s FAFSA form. Using the tool takes most people less than five minutes, and you don’t need a StudentAid.gov account to access it. The Who’s My FAFSA Parent? wizard is especially helpful for divorced parents who want to understand which parent will be a required contributor on the FAFSA form.
1
Create an account and gather documents.
Before you can access the FAFSA form online, you’ll need to create a StudentAid.gov account if you don’t have one already. Every contributor, including the student, must have their own account to access and complete their sections of the form, and your account username and password will serve as your legal electronic signature throughout the federal student aid process.
For information about StudentAid.gov accounts, including step-by-step guidance on creating an account, read our “Key Facts About Your StudentAid.gov Account” article.
IMPORTANT: Your child must have their own StudentAid.gov account. You can’t create an account for or share an account with your child.
Don’t share your StudentAid.gov account username and password with anyone, not even your child. Similarly, your child shouldn’t share their account log-in information with you. Keep your account secure—you’ll need to log in at StudentAid.gov to help your child complete their FAFSA form each year and to access federal student aid information online.
If you plan to start the FAFSA form on behalf of your child, we suggest that you request a printed copy or a screenshot of the “Personal Information” section of their StudentAid.gov account before you start the form. You will need to make sure the personal information you enter on the FAFSA form exactly matches the information your child provided when they created their StudentAid.gov account. To access this information, your child should log in to StudentAid.gov and select “Personal Information” in their account settings.
There are other items you should have on hand to complete the FAFSA form:
- your child’s Social Security number (and A-Number if they are an eligible noncitizen)
- your spouse’s date of birth and email address if you’re married
- tax return documents, including federal income tax returns, W-2s, and other records of money earned from work
- records of child support received
- bank statements and records of investments
- records of businesses and income-producing farms (if applicable)
Once you have everything you need, including your StudentAid.gov account, you can start the FAFSA form.
If your child has already started their FAFSA form and has invited you as a contributor, there are a few ways to accept the invitation. The recommended way is using the invitation email you’ll receive that includes a button to “Accept Invitation” and a unique invitation code for your child. By selecting the button in the invitation email, you can enter their form.
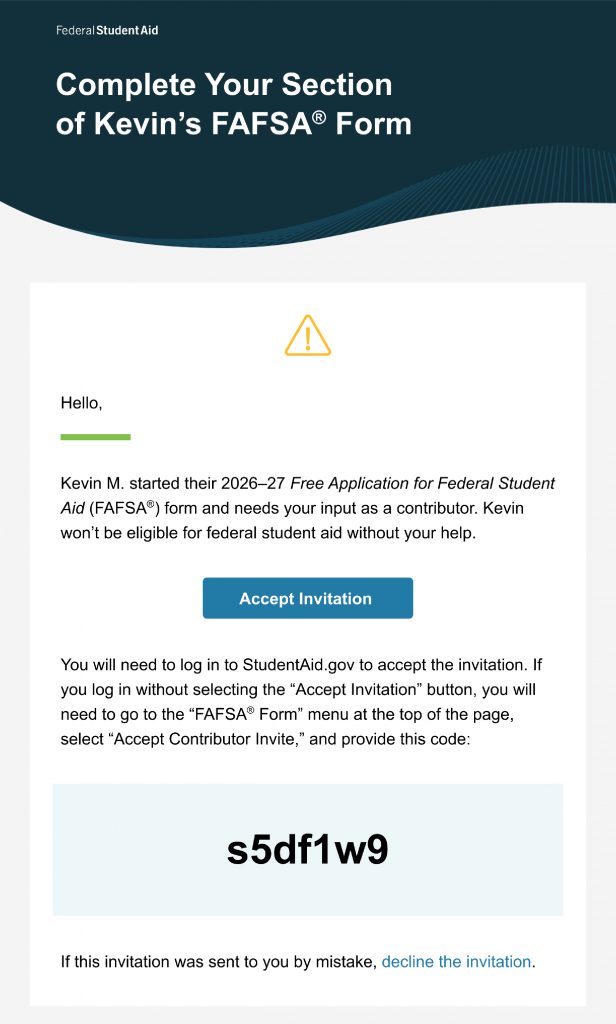
As alternative methods, your child will also receive an invitation link that can be shared with you directly, or you can visit fafsa.gov and select the “Accept an Invitation” button on the page. Enter the invitation code for your child to enter their form. You can then jump to step four in this article.
The FAFSA® form is the student’s application and not yours. Students are encouraged to begin their form and invite any additional contributors that are needed.
2
Start the FAFSA® form at StudentAid.gov
Go to fafsa.gov to be taken to the FAFSA home page, and then select “Start New Form.”
You’ll be directed to log in to your StudentAid.gov account. Once you’re logged in, you’ll be asked to select who is starting the FAFSA form. If you’re starting the FAFSA form on behalf of your child, select “Parent.”
On the “Student Information” page, enter your child’s name, date of birth, Social Security number (if they have one), email address, and mailing address. (A mailing address at this step will be required only if your child is a citizen of the Freely Associated States and doesn’t have a Social Security number.)
Make sure you enter your child’s personal information exactly as it appears on their StudentAid.gov account (if they already have one) to avoid errors. Don’t enter any nicknames or suffixes—for example, don’t enter “Johnny” or include “Jr.” or “III” for the names John Paul Jr. or John Paul III.
Remember: If your child has a StudentAid.gov account, the personal information you enter must exactly match the information they provided when they created their account.
Once you’re sure that all the information you’ve entered about the student (your child) is accurate, select “Continue” on the FAFSA form. If your child hasn’t started the FAFSA form yet, they’ll receive an email notifying them that a FAFSA form was started on their behalf. They can then follow the steps included in the email to enter the form and complete the student sections, provide their consent and approval, and sign the form.
Avoid an incomplete FAFSA® form. Even if you start the form on behalf of your child, they still need to enter the form to complete the student sections, provide their consent and approval, and sign the form.
After entering your child’s information, you’ll be taken through a series of four onboarding pages. These pages include a FAFSA overview, information about contributors, what to expect on the FAFSA form, and what happens after the form is submitted. On the final onboarding page, you can select “Start FAFSA Form.”
You’ll need to verify your child’s information on the “Student Identity Information” page and provide their mobile phone number and permanent mailing address. Again, be very careful that the information you enter here exactly matches the student’s “Personal Information” section of their StudentAid.gov account settings. You’ll also need to provide your child’s state of residence before you can continue to the next section of the FAFSA form.
3
Complete the “Student Personal Circumstances” section.
In this section, you’ll respond to a series of specific questions to find out whether your child is a dependent or independent student on the FAFSA form. This dependency status will determine whether your child needs to provide your (parent) information on the FAFSA form. These questions include your child’s marital status and what grade level they will be for the school year. You’ll also be asked to review a list of student personal circumstances and select any that apply to the student.
Next, you will answer questions on the “Student Homelessness” and “Student Unusual Circumstances” pages. After you’ve answered all the questions, the “Student Dependency Status” page will inform you whether your child has been identified as dependent, independent, or provisionally independent.
The law sets these dependency guidelines. They are different from those used by the IRS. Even if your child doesn’t live with you, supports themselves, or files taxes separately from you, we may still refer to them as a dependent student for federal student aid purposes.
If your child is a dependent student, your information will be required on their FAFSA form. If your child is an independent student, your information will not be required on their form, and you won’t be able to continue filling out the form for your child.
4
Provide consent and approval.
You are now entering the parent section of the FAFSA form. First, you’ll verify your own information. If you need to update your personal information that’s listed, you can do so by accessing your account settings on StudentAid.gov.
After verifying your personal information, you’ll be asked to provide consent and approval for the transfer of federal tax information directly from the IRS into the FAFSA form. Consent and approval are required for your child to be eligible for federal student aid. Watch our What Does It Mean To Provide Consent and Approval on the FAFSA® Form? video to understand what you agree to when you provide consent and approval.
Providing consent and approval does not make you financially responsible for your child’s education costs. However, if you choose to take out a Direct PLUS Loan for parents to help with your child’s education, you will take on financial responsibility for that loan after signing your Master Promissory Note.
The FAFSA® form is an application and not an obligation for loans. Signing a Master Promissory Note makes an individual financially responsible to repay your loan and any accrued interest and fees.
5
Complete the “Parent Demographics” section.
The “Parent Demographics” section is where you’ll provide your own demographic information. This includes your marital status and your state of residence.
When selecting your marital status in this section, you should follow this guide:
- never married—select “Single (never married)”
- currently married—select “Married (not separated)”
- divorced or separated but currently living together or never married but living together—select “Unmarried and both legal parents living together”
- divorced and not currently living together—select “Divorced”
- separated and not currently living together—select “Separated”
- divorced or separated from your child’s other legal parent but remarried—select “Remarried”
- previously married but now a widow—select “Widowed”
Make sure you report your marital status as of the day you fill out the FAFSA form, even if it is different from your tax filing status.
After providing your marital status, you will select your state of residence and enter the date (month and year) when you became a resident.
6
Complete the “Parent Financials” section.
While providing consent and approval allows for the transfer of your federal tax information directly from the IRS into the FAFSA form, there is additional information you’ll need to provide about your financial situation. You can check what year’s income and tax information you’ll be required to report before starting the FAFSA form. Do not use a different year’s tax information.
The required information includes
- federal benefits you or anyone in your family received;
- your tax filing status and whether you filed jointly with your spouse;
- your family size
- how many people in your family will be in college during the school year for which your child is applying for aid;
- the dollar amount of taxable college grants, scholarships, or AmeriCorps benefits reported as income to the IRS;
- the dollar amount of Foreign Earned Income Exclusion;
- child support received;
- the total of your cash, checking, and savings accounts;
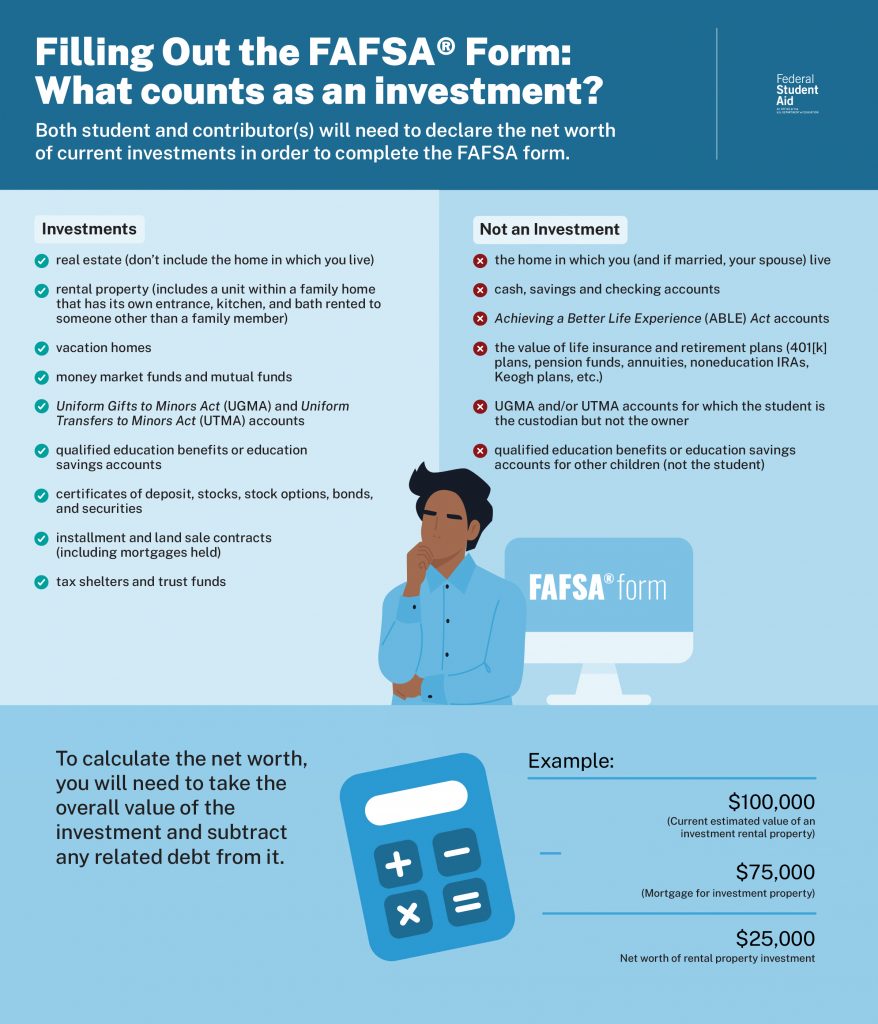
- the net worth of your investments, including real estate; and
- the net worth of your businesses and income-producing farms.
You may be asked to provide additional information about your tax return. If this is the case, understand where to find the requested information on your IRS Form 1040.
7
Invite your spouse as a contributor (if required).
Your response to the marital status question in the “Parent Demographics” section and your tax filing status provided in the “Parent Finances” section will determine whether additional contributors are needed on your child’s FAFSA form.
If you’re married (and not separated) and filed taxes jointly with your current spouse, only one parent will be required to be a contributor on the FAFSA form. However, you will need to provide your spouse’s date of birth for all required information in the parent sections of the form to be complete.
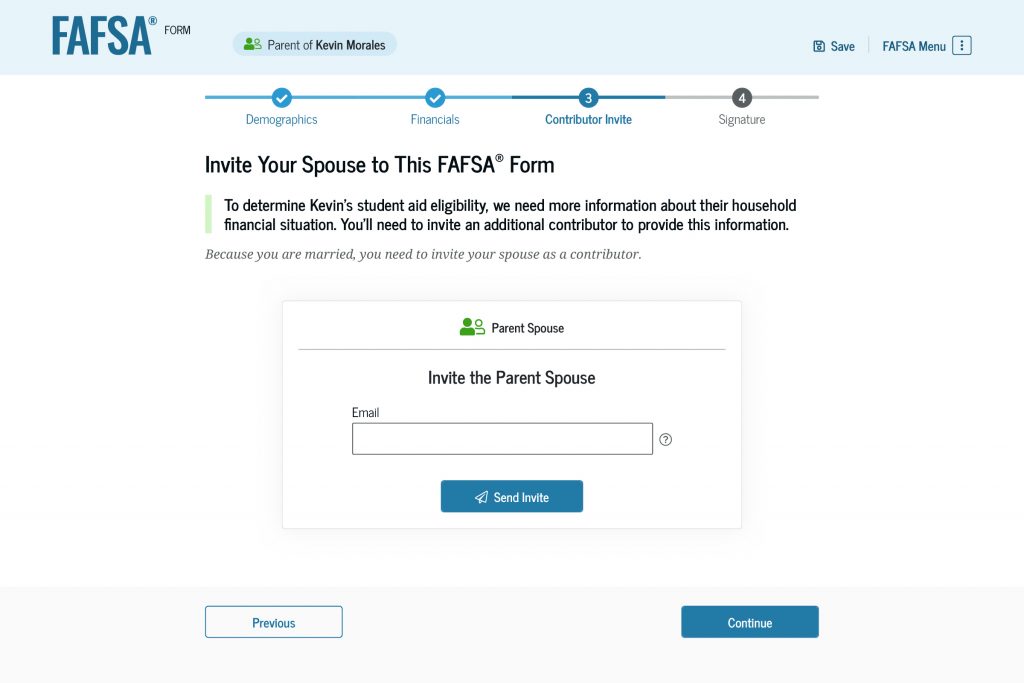
If you’re married and didn’t file taxes jointly with your current spouse, you’ll need to invite your spouse as a contributor. On the “Invite Your Spouse to This FAFSA® Form” page, you’ll enter your spouse’s email address. After confirming the email address, you can send the invitation.
Your spouse will receive an email with an invitation link and code to enter your child’s FAFSA form. They can then provide the required information, along with their consent and approval, and sign the form.
Remember that every contributor on the FAFSA form will need their own StudentAid.gov account.
8
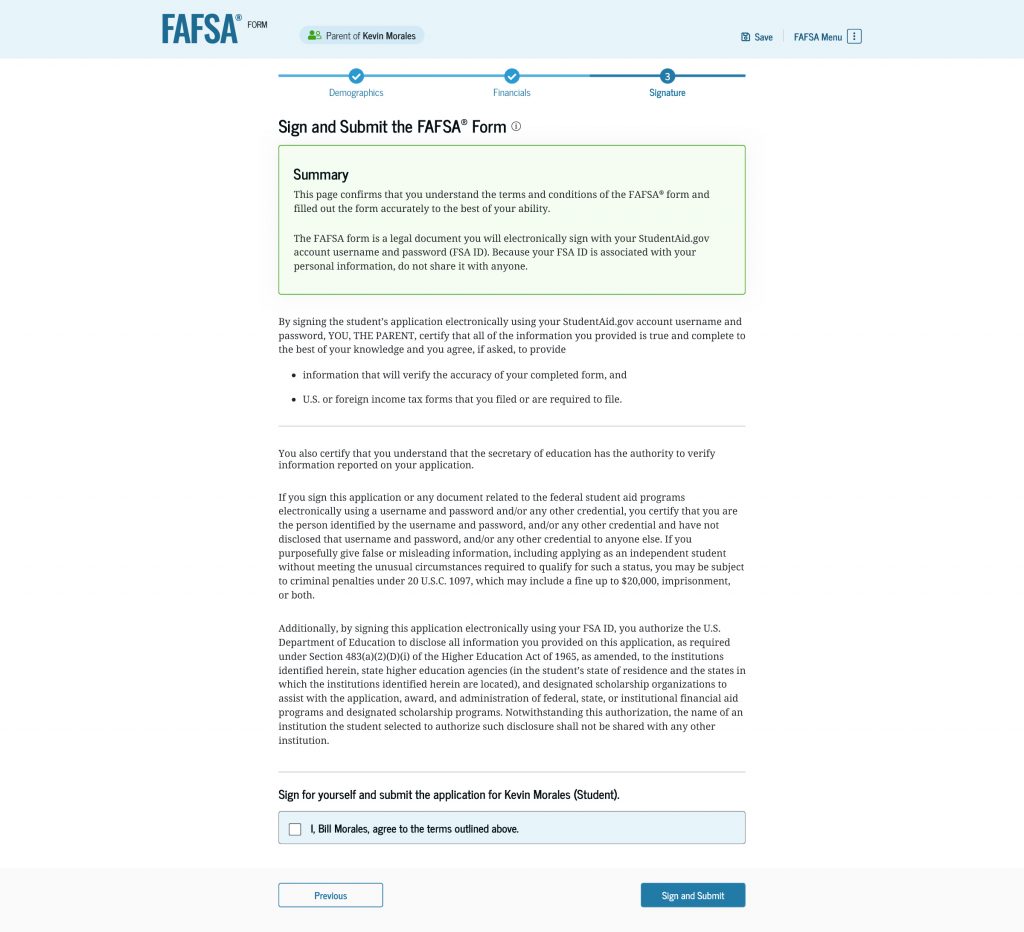
Sign the FAFSA® form.
After completing the parent sections of the FAFSA form, you’ll have the chance to review all your answers and the information you provided. If you notice any errors, make sure you correct them before selecting “Continue.”
You’ll be taken to the signature page where you can review the terms and conditions of the FAFSA form. Remember, the FAFSA form is a legal document that you will electronically sign using your StudentAid.gov account username and password. Once you’ve reviewed the terms and conditions, you can select “Sign,” and your section of the form will be complete.
If you were invited as a contributor on your child’s FAFSA form and if your child has already completed the required student section, you’ll be able to select “Sign and Submit” to complete the form as long as no additional contributor participation (such as your child’s other parent or your spouse) is required.
9
Have your child provide their information, consent and approval, and a signature.
For a FAFSA form to be considered complete, all contributors must provide their information, consent and approval, and signature on the form. This includes your child.
If you start the FAFSA form on your child’s behalf, remind them to enter and complete their form. They can do so by following the steps included in their invite email or by logging in to their StudentAid.gov account and selecting their FAFSA form under the “My Activity” section.
Your child will need to enter their FAFSA form and complete the student sections. These include the “Student Demographics,” “Your Finances,” and “Select Colleges and Career Schools” sections.
After your child provides the required information and their consent and approval and signs the form, their FAFSA form can be submitted.
Congrats, you completed the FAFSA® form!
Your child is one step closer to receiving financial aid for college, career school, or trade school now that their FAFSA form is complete. With this major step out of the way, learn what your child should do next after submitting the FAFSA form.
Your child will receive a confirmation email after the FAFSA form is submitted, and they’ll be able to log in to their StudentAid.gov account to check the processing status of their form.
Once your child’s FAFSA form is processed, they will receive their FAFSA Submission Summary. Review it carefully with them.
If your family has special financial circumstances, such as significant changes to your family’s financial situation that should be taken into account, your child should contact their school’s financial aid office after their FAFSA form is submitted. The school may require documentation.
Remind your child to stay on the lookout for any communications from their school(s). This could include a request for additional information, forms, or signatures. Your child will also receive financial aid offers from their school(s). Understand what will be included and how you can help your child compare aid offers.