Steps for Students Filling Out the FAFSA® Form

This article reflects updates to the 2026–27 FAFSA® process, including how to invite contributors to the FAFSA form.
When you submit a Free Application for Federal Student Aid (FAFSA®) form, you’re gaining access to the largest source of federal student aid to help pay for college, career school, or trade school. This includes federal grants (such as a Federal Pell Grant), work-study funds, and federal student loans.
Completing and submitting the FAFSA form is free—and it’s for more than just federal student aid. States, schools, and some private aid providers also use the information you provide on your FAFSA form to determine your eligibility for their financial aid programs. So, make sure you complete your form before your school and state deadlines to be eligible for as much aid as possible.
If you’re new to filling out the FAFSA form, you may feel a little unsure of how to do it. We’re here to guide you through each section of the FAFSA form. Select a link below if you want to jump to information about a particular section of the form.
- Student Identity Information
- Personal Circumstances
- Demographics
- Financials
- Colleges and Career Schools
- Contributor Invite
- Signature
When you’re ready to fill out your FAFSA form, you can get started at fafsa.gov. It takes most people less than 30 minutes to complete the FAFSA form, including gathering any personal documents and financial information needed to complete it.
If you need help with any of the questions on the FAFSA form, you can select the question mark or info icons on each page for more information about that question. You can also chat with Aidan®, our virtual assistant, for help while you complete your form. To review all our FAFSA help topics, visit the “FAFSA® Help” page.
Important Information Before You Get Started
To avoid errors or possible delays with your FAFSA form, review the information below before you start filling it out.
Your StudentAid.gov Account
Before you can complete the FAFSA form online, you’ll need a StudentAid.gov account.
If you don’t already have an account, read our “Key Facts About Your StudentAid.gov Account” article to learn what you need to know. When you’re ready to create your account, go to StudentAid.gov/create-account.
Your Required Contributors
If you’re a dependent student, you’ll be required to provide parent information on the FAFSA form. In most cases, at least one parent will be identified as a contributor on your form. A contributor is anyone (you, your spouse, your biological or adoptive parent, or your parent’s spouse) who is required to provide information on the FAFSA form, sign the FAFSA form, and provide consent and approval to have their federal tax information transferred directly from the IRS into the form.
Each contributor identified to participate on your FAFSA form must have their own StudentAid.gov account to access and complete their required sections of the form.
If you want to know which parent you’ll need to invite to the FAFSA form before you start filling it out, try the Who’s My FAFSA Parent? wizard. Using this interactive tool takes most people less than five minutes. The tool may be especially helpful if your parents are separated or divorced, or if you have a stepparent.

We recommend that you start your own FAFSA® form and complete your sections first to save time and prevent errors.
1
Student Identity Information
To start your FAFSA form, go to fafsa.gov and select “Start New Form.”
If you’re not logged in to your StudentAid.gov account, you’ll be taken to the “Log In” page where you’ll enter your username and password to log in to your StudentAid.gov account.
The first question will ask you who is starting the FAFSA form—select “Student.” You’ll then review a few pages with helpful information about the FAFSA form. When you’re done, select “Start FAFSA Form” to be taken to the first section: “Student Identity Information.”
Information from your StudentAid.gov account will appear in this section—review this information to verify that it’s correct. If you need to update any of this information, you can do so in the account settings of your StudentAid.gov account.
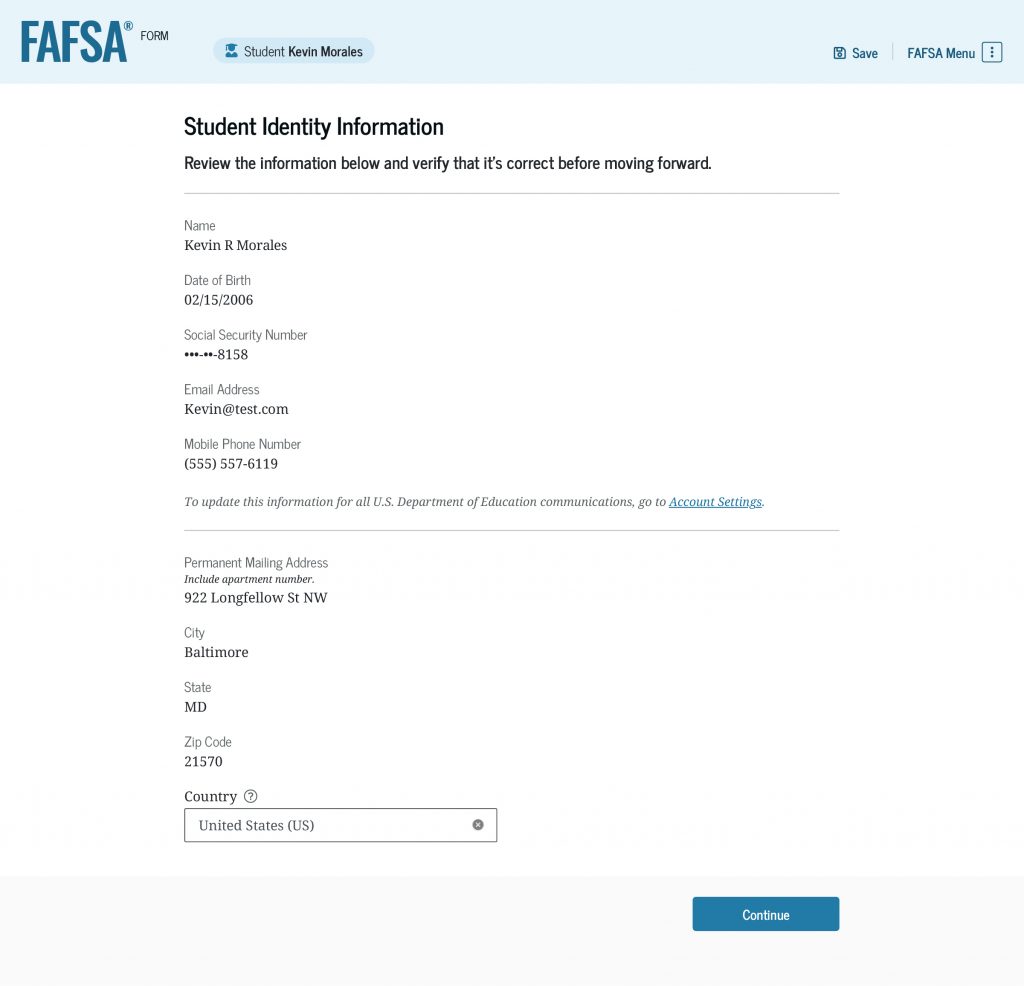
Next, you’ll select your state of residence and provide the month and year that you became a resident of this state. Usually, this is the state where you live while not attending college, career school, or trade school. If you have questions about this, read our “State of Residence” help article.
You’ll also provide consent and approval for your tax information to be transferred directly from the IRS into your FAFSA form. Even if you didn’t file taxes, you must provide consent and approval to be eligible for federal student aid.
2
Personal Circumstances
In this section, you’ll answer questions that will help determine your dependency status and eligibility for federal student aid.
First, you’ll answer questions about your marital status and your college or career/trade school plans.
On the “Student Personal Circumstances” page, you’ll see a list of circumstances. Select all the boxes that apply to you—if none apply, select “None of these apply.”

You’ll also be asked if you’re homeless or at risk of being homeless. If you answer yes, you’ll see an additional question about who made that determination.
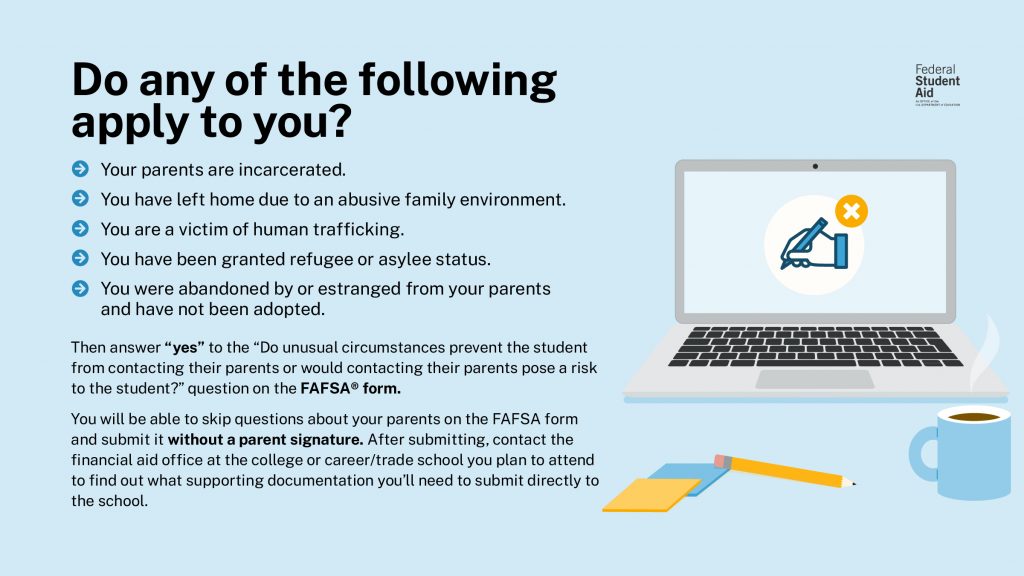
If you selected “None of these apply” to the circumstances listed on the “Student Personal Circumstances” page and you don’t meet the other criteria to be an independent student, you’ll be asked if unusual circumstances prevent you from contacting your parent(s).
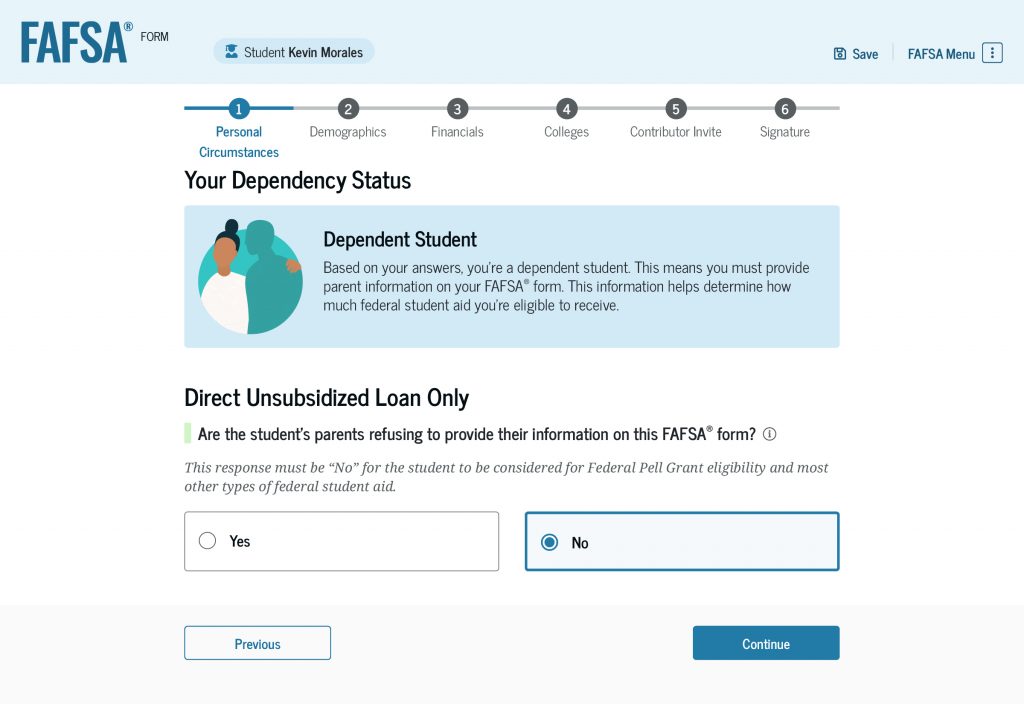
After answering the questions on these pages, the FAFSA form will inform you of your dependency status (as determined by law) for federal student aid purposes. Your dependency status isn’t based on if you live with your parents, if they provide financial support, or if they claim you as a dependent on their taxes.
Instructions for Dependent Students
If the FAFSA form determines that you’re a dependent student, you’ll need to answer the question: “Are the student’s parents refusing to provide their information on this FAFSA® form?”
Important: If you change your response to “Yes” and complete your form without parent information, you won’t be eligible for a Federal Pell Grant or most other types of federal student aid. You will be eligible for a Direct Unsubsidized Loan only.
Being a contributor on the FAFSA form won’t make your parent(s) responsible for paying for your education costs, so make sure you select “Yes” only if your parent(s) refuse to participate on your FAFSA form.
3
Demographics
This section will ask questions about your and your parents’ background. Some of these questions will help determine how much federal student aid you may be eligible to receive.
You’ll be asked about your sex, race, and ethnicity. Your answers here won’t affect your eligibility for federal student aid, be used in any calculations, or be shared with any schools that you list on your FAFSA form. They are used for research purposes only.
Next, you’ll be asked about your citizenship status. You must be a citizen or eligible noncitizen to receive federal student aid.
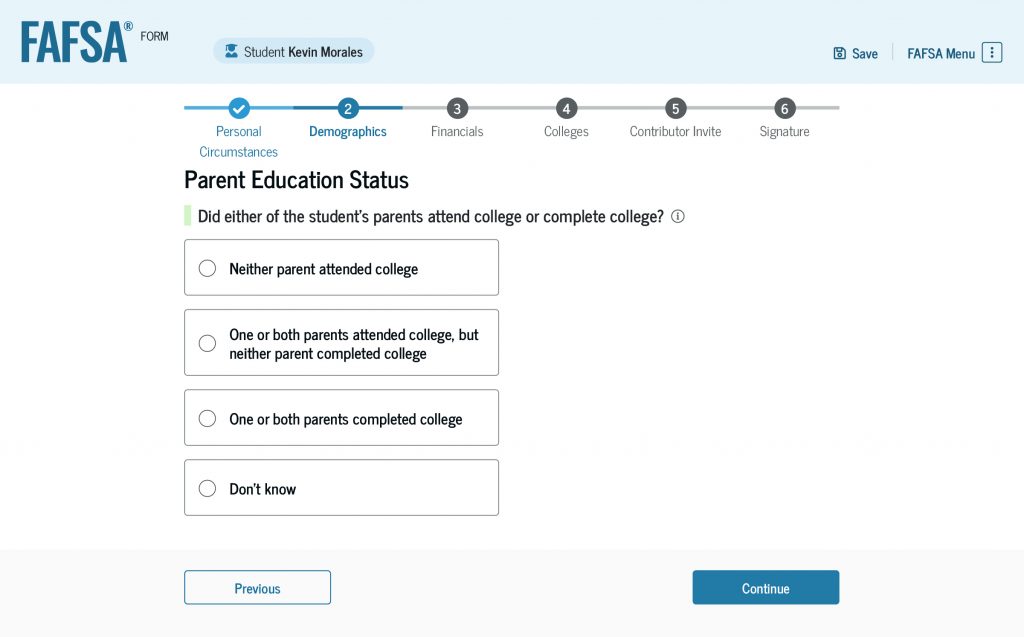
Then, you’ll be asked about your parents’ education status. If you’re unsure, select “Don’t know.”
You’ll also be asked if your parent or guardian was killed in the line of duty while either (1) serving on active duty as a member of the U.S. armed forces on or after the events of 9/11, or (2) performing official duties as a public safety officer.
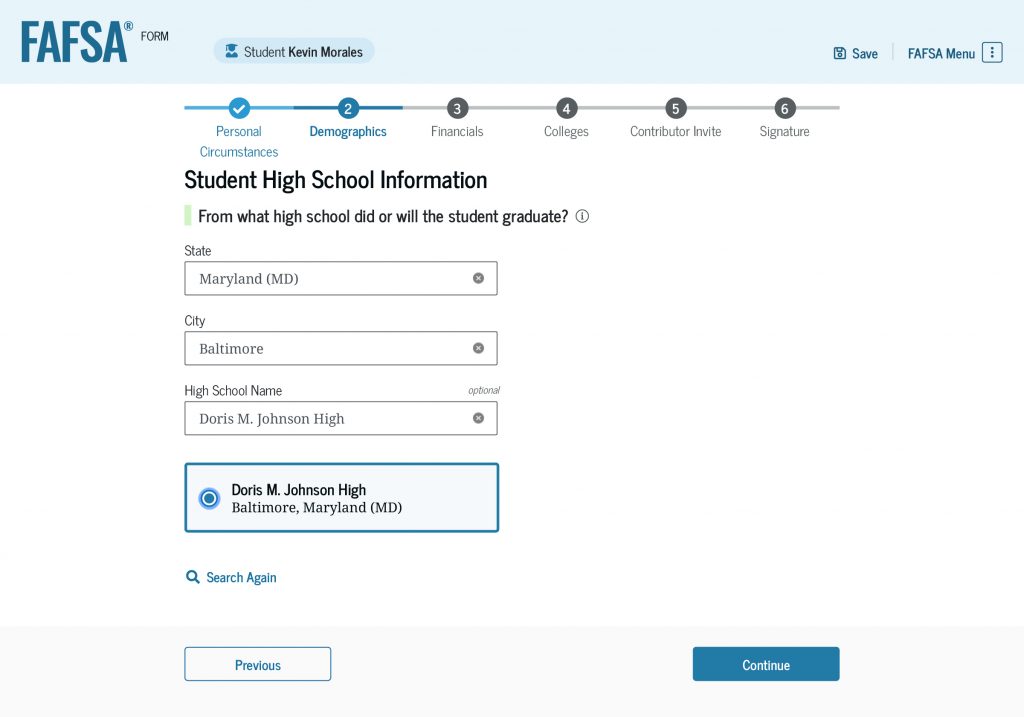
Next, you’ll select your high school completion status. If you select “High school diploma,” you’ll need to provide information about your high school. After you enter your high school’s state and city, select “Search.” Then select your high school from the search results and confirm your school’s information.
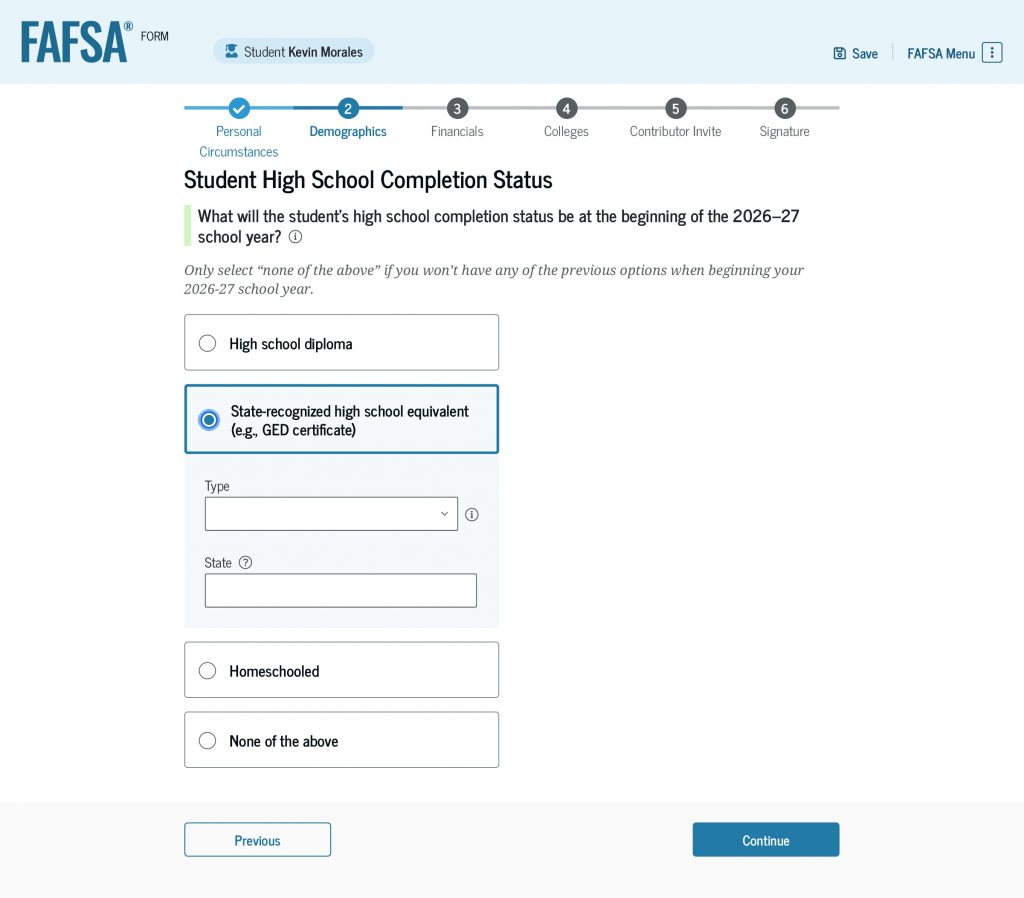
If you select “State-recognized high school equivalent” as your high school completion status, you’ll need to provide the type and the issuing state.
4
Financials
Next, you’ll enter your financial information, which will be used to determine your ability to pay for college, career school, or trade school. The questions in this section are different for dependent and independent students, so follow the instructions below that reflect your dependency status.
Note: Sometimes, your or your family’s finances may not accurately be reflected on the FAFSA form because of special financial circumstances. In this case, you should still follow all the instructions to submit your FAFSA form. Then, you should contact the financial aid office at the school you’re planning to attend to request an aid adjustment. Your school may ask you to provide documentation about your circumstances so that they can consider making an adjustment to your FAFSA information and aid offer.
Instructions for Dependent Students
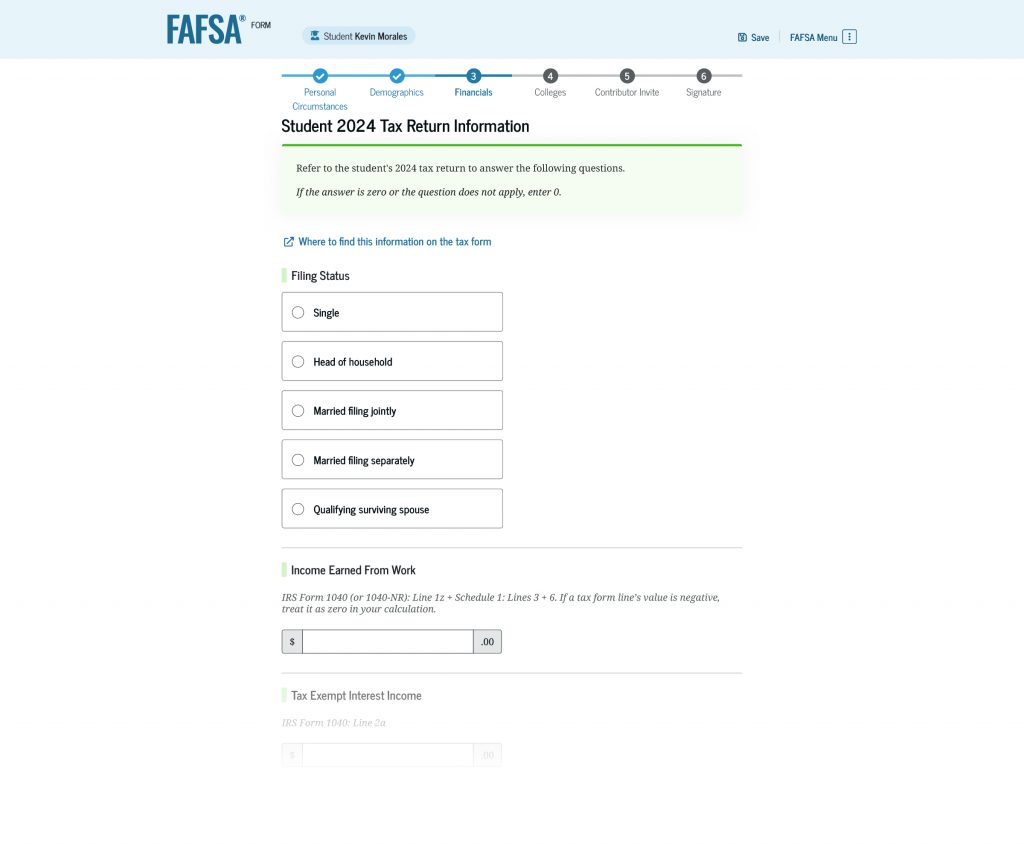
The first question you’ll respond to in the “Financials” section is about your tax filing status.
Next, you’ll provide some additional financial information. Because you already provided consent and approval to transfer your tax information directly from the IRS into your form, your federal tax information may not be required in this section. However, you’ll still need to enter responses in any answer boxes that appear.
Remember: If you or your family has special financial circumstances, you should still follow all the instructions to complete your FAFSA form. Afterward, notify the financial aid office at the school you’re planning to attend to request an aid adjustment.
Enter your own financial information only. Your parent(s) will enter their financial information when they complete their sections of your FAFSA form. If your answer to any of the questions is zero or if the question doesn’t apply to you, enter 0. You shouldn’t leave any of the questions blank.
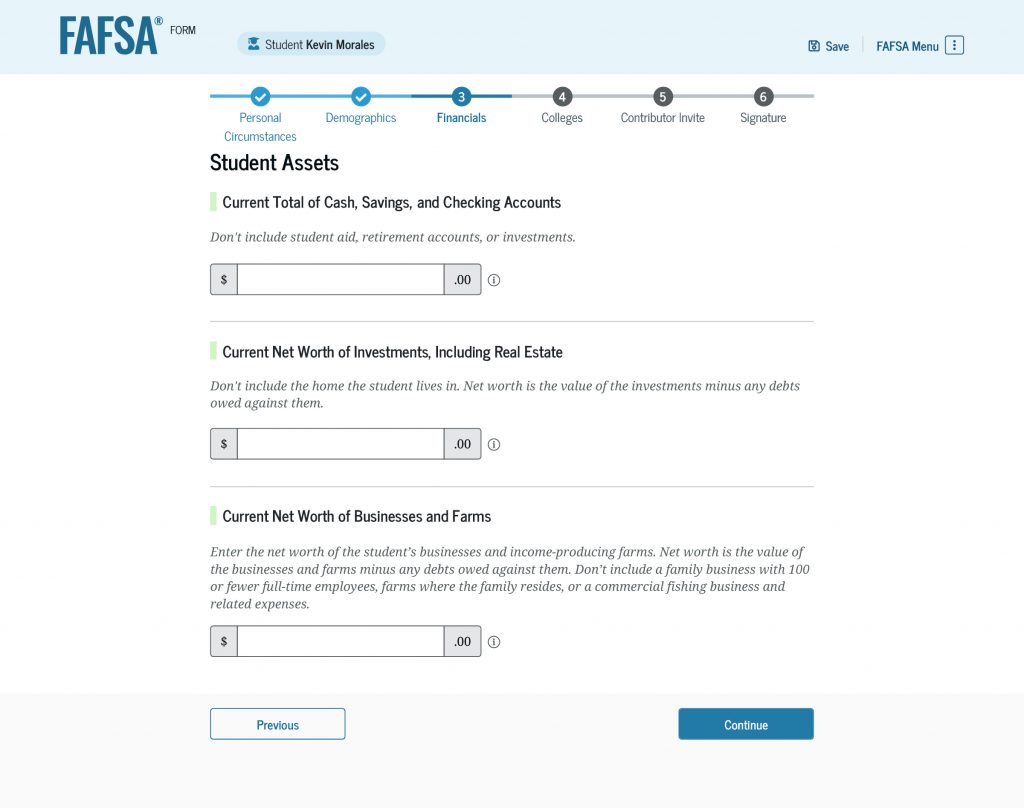
You’ll be asked to enter information about your assets, including your current total of cash, savings, and checking accounts. Remember: It’s OK if your answer is zero—just enter 0.
You’ll also be asked about the net worth of your investments, including real estate, businesses, and income-producing farms. Learn how to determine the net worth of businesses and farms.
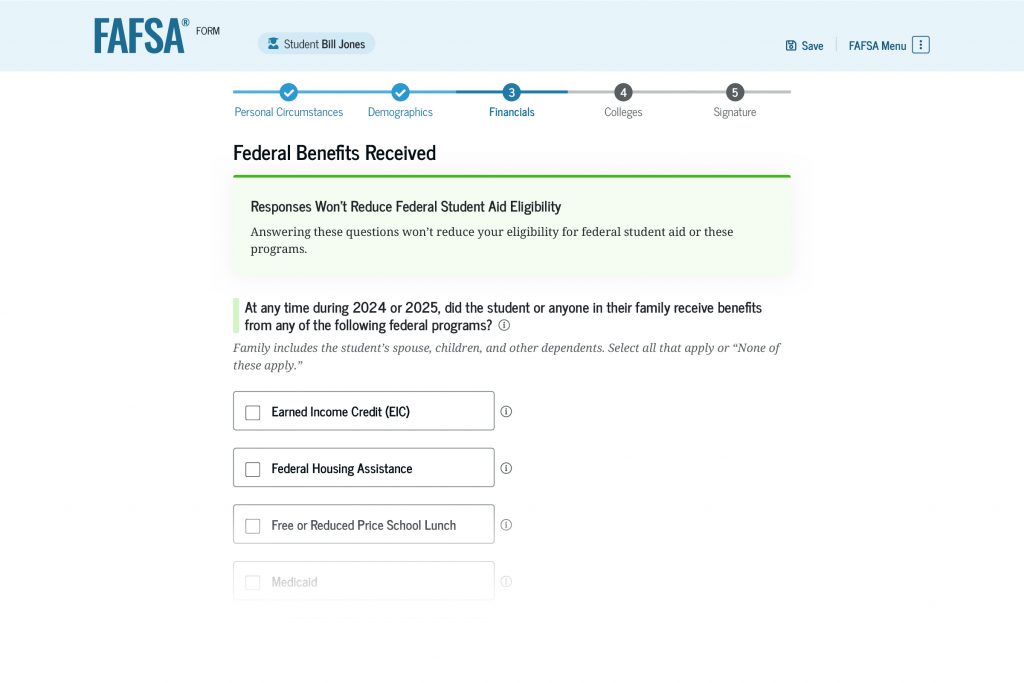
Instructions for Independent Students
If you’re an independent student, you’ll first answer if you or anyone in your family received certain federal benefits. Then, you’ll respond to questions about your tax filing status.
Next, you’ll provide information about your family size and the number of people in your family who will be in college during the school year for which you are applying for financial aid.
Because you already provided consent and approval to transfer your tax information directly from the IRS into your FAFSA form, your federal tax information may not be required in this section. However, you’ll need to provide some additional financial information.
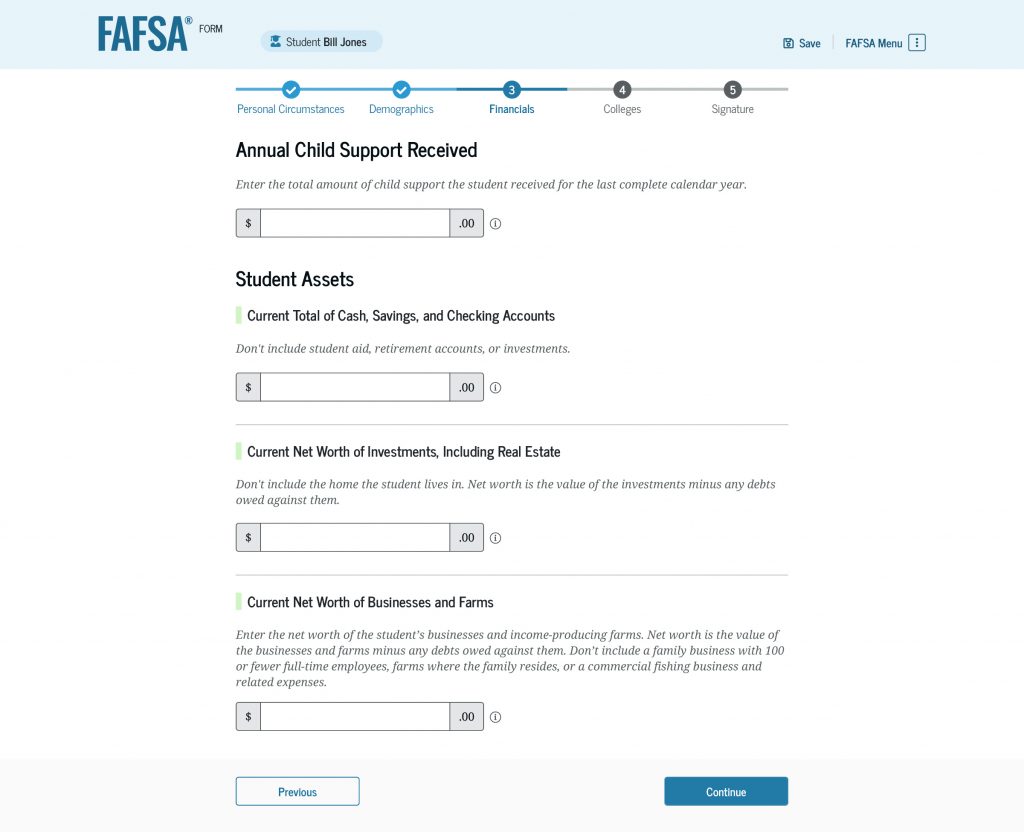
You’ll be asked to enter the amount of child support received for the last complete calendar year (if any). You’ll also be asked to enter information about your assets, including your current total of cash, savings, and checking accounts. Make sure you report the amount for each item requested—if your answer is zero, then enter 0.
You’ll also be asked to enter the net worth of your investments, including real estate, businesses, and income-producing farms. Learn how to determine the net worth of businesses and farms.
5
Colleges and Career Schools
In this section, you’ll select the schools you’re considering or plan to attend so that they automatically receive an electronic copy of your FAFSA form and can use your information to determine the types and amounts of student aid you may receive.
You can add a maximum of 20 colleges, career schools, and trade schools (and a minimum of one school) to your online FAFSA form. Make sure to include all the schools you’re considering, even if you’re not certain you’ll apply to all of them. You can add or delete schools on your form later.
Search for schools by entering a state, city, and/or the school’s name and then selecting “Search.”

Next, you’ll select the correct school(s) from your search results.

If you can’t find your school by searching for the school’s state, city, and/or name, you can search by entering the school’s federal school code.
Repeat this process to add each of the schools you want to receive your FAFSA information (up to a maximum of 20 schools).
After you’re done, review your list of schools and then select “Continue” to move to the next section. Note: For the purposes of federal student aid, the order in which you list the schools doesn’t matter. However, some states require that the schools be listed in a specified order for you to be considered for state aid. If this applies to you, the FAFSA form will instruct you to reorder the schools.
6
Contributor Invite
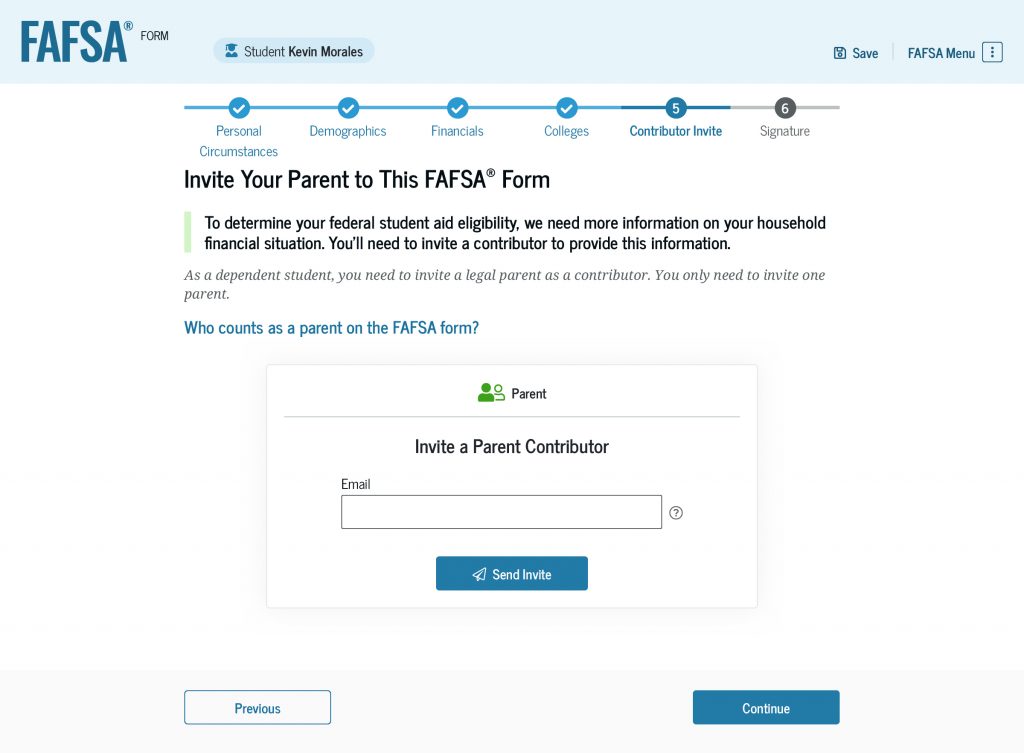
If the FAFSA form determined that you’re a dependent student, you’ll be required to invite a legal parent (a biological or adoptive parent as determined by the state) to participate on your FAFSA form.
Not sure which parent you should invite to your form? The FAFSA form links to the Who’s My FAFSA Parent? wizard, our tool that helps you determine which parent to invite. Note: You’ll be required to invite only one parent to your FAFSA form. If another parent needs to provide information, the FAFSA form will prompt your parent to send them an invitation.
If you’re an independent student and you’re married (and not separated) and didn’t file taxes jointly with your current spouse, you’ll be required to invite your spouse to participate on your FAFSA form.
How To Invite a Contributor
To invite your parent or spouse contributor to your FAFSA form, you’ll enter their email address and select “Send Invite.” After you confirm your contributor’s email address, they’ll receive an email invitation to participate on your FAFSA form.
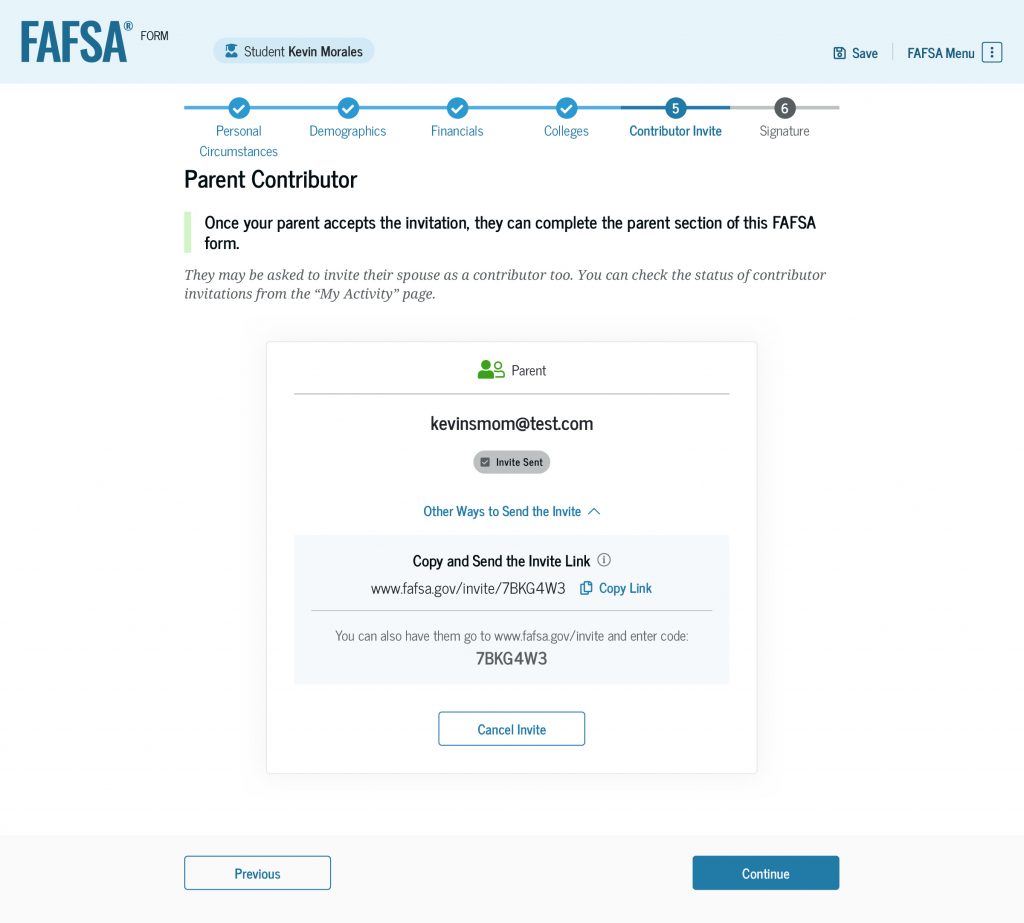
On the next screen, you’ll see confirmation that the invitation email was sent. You will also be provided with an invite link and code that you can share directly with your contributor.
Remember: Each contributor on your FAFSA form will need their own StudentAid.gov account to access, fill out, and sign your form.
7
Signature
You made it! You’re now on the last section of your FAFSA form. Before you sign your FAFSA form, review your responses. You can select “Expand All” to review all your responses or you can expand each section individually.
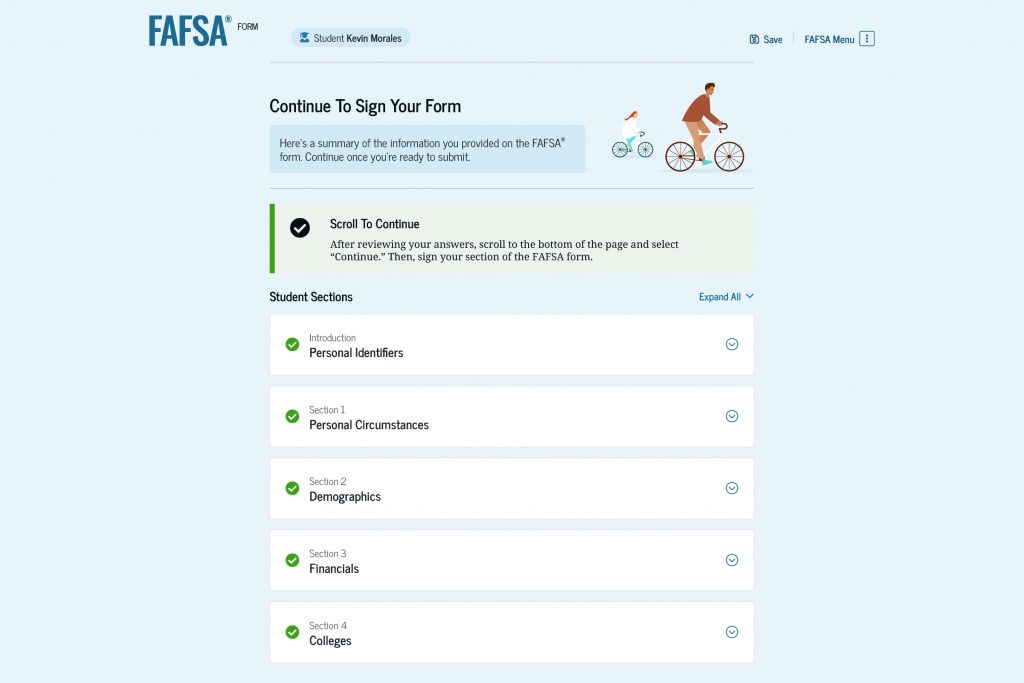
To edit or correct one of your answers, select the question’s hyperlink to be taken to the corresponding page of the FAFSA form.
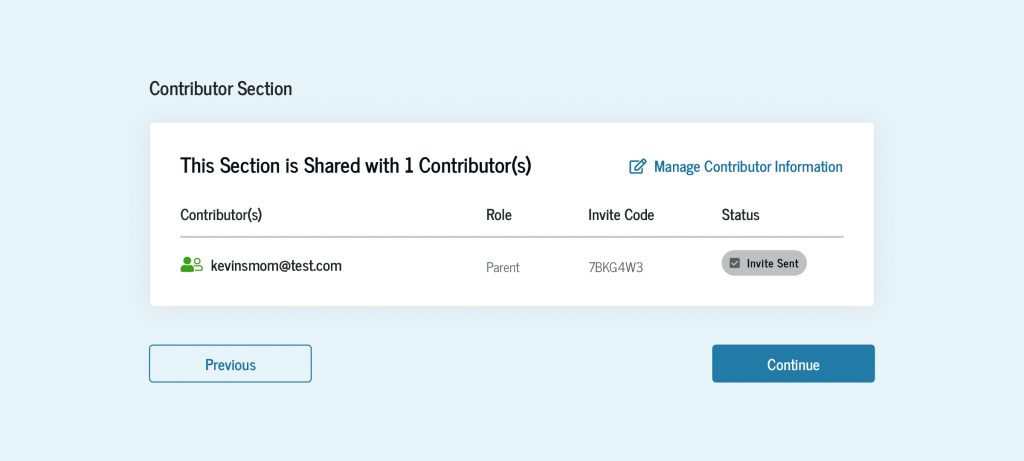
If you invited a contributor, you’ll also see their invite information and the status of their sections.
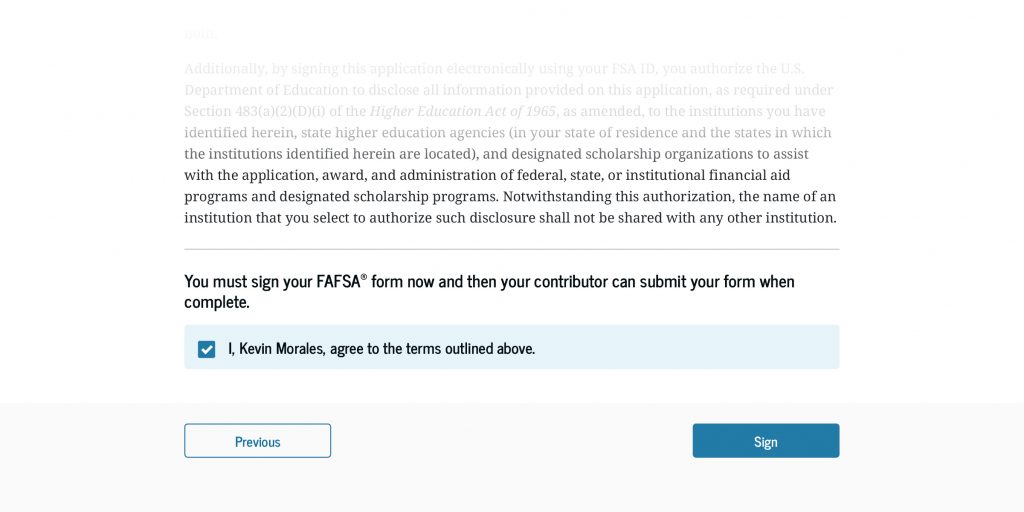
Once you’ve checked that your FAFSA answers and contributor information are accurate, review the terms and conditions of what you’re agreeing to by signing your form.
When you’re ready to sign your form, select the checkbox saying you agree to the terms and then select the “Sign” button.
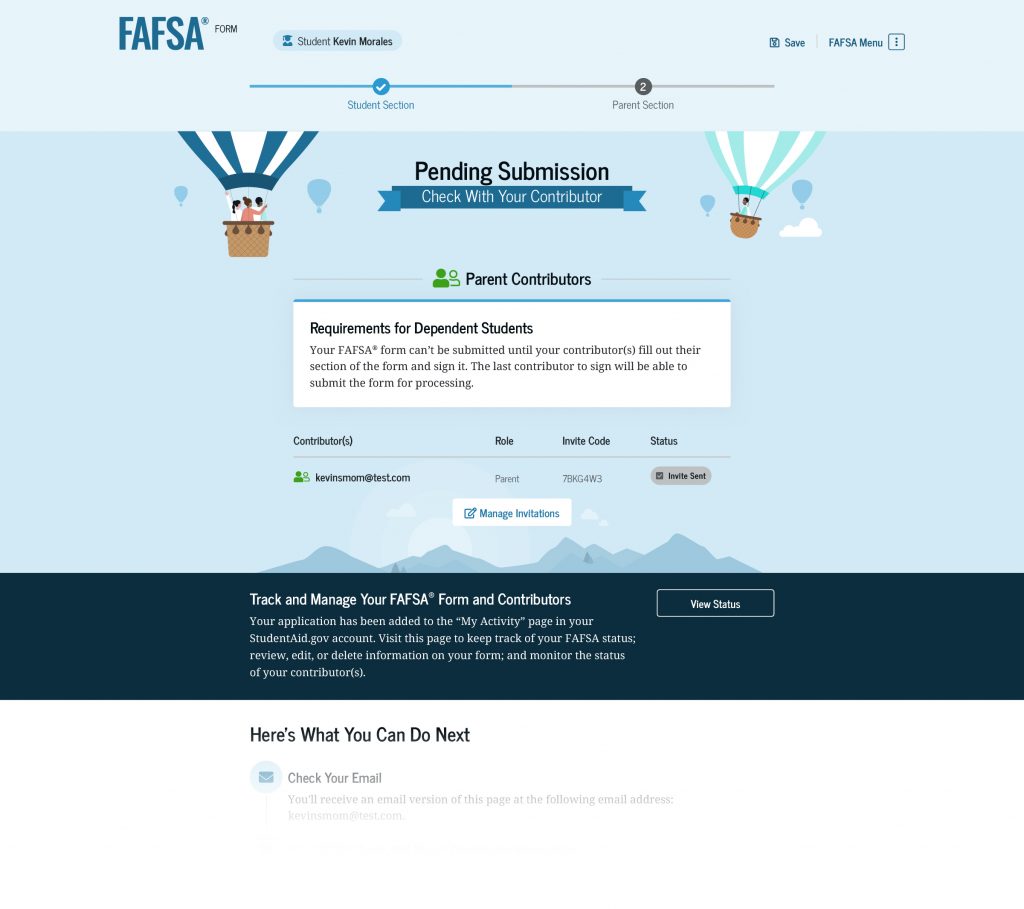
If you have contributors who need to participate on your form, they will need to complete and sign their sections before your form can be submitted.
If you don’t have any contributors, or if your contributors have already completed and signed their sections of your form, congratulations! You have completed your FAFSA form.
Whether or not your FAFSA form is complete, after signing your FAFSA form, you’ll see next steps and information about tracking and managing your form.
After your FAFSA form is processed, you’ll receive an email with your FAFSA Submission Summary. The FAFSA Submission Summary will help you understand your next steps as you prepare to receive financial aid offer letters from schools. It’s important to review your FAFSA Submission Summary closely because you could be selected for verification of your aid eligibility or need to make a correction to your form. Learn about the FAFSA Submission Summary by reading the “What You Need To Know About the FAFSA Submission Summary” article.
To avoid delays with your federal student aid and increase your chances of getting additional aid for school, you’ll want to take a few steps after you submit your FAFSA form. Read the “7 Things To Do After Submitting Your FAFSA® Form” article to learn what to do next.